Conference Rooms can currently be booked via two methods: via Outlook or via Visual Directory. This guide shows how to book a conference room with both methods. Visual Directory can also be used to book offices and other resources.
Visual Directory
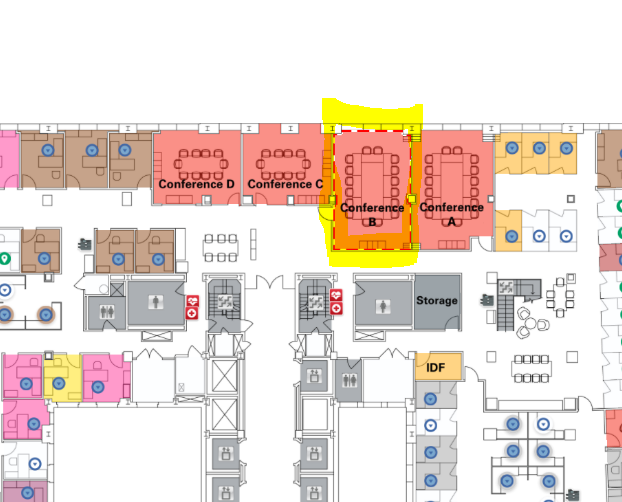
Navigate to Visual Directory ( https://cpcs.officespacesoftware.com/visual-directoryCPCS ) and locate the room you want to book. If you have not used Visual Directory before, a guide is available here: OSS_JobAid_Login_022318
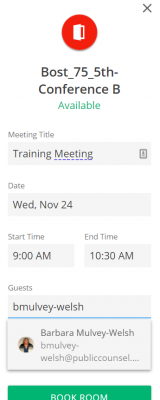
Click on the conference room or other bookable location, and the info pane on the right side will give you a booking screen.
Enter the Meeting Title, Date & Time. You can invite guests to the meeting by looking them up in the Guests box, either by name or email address.
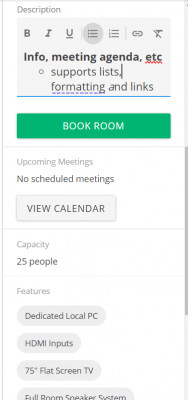
You can also enter a Description, such as a Zoom link for hybrid meetings, or a meeting agenda. The description supports text formatting and links, using the buttons above the description box.
At the bottom of the info pane, the Features section lists the room Capacity, available A/V equipment, and other ammenities.

When you are ready to confirm your booking, click Book Room. You will receive a confirmation popup in Visual Directory, as well as an email confirmation. The meeting will also be automatically added to your Outlook calendar.
Outlook
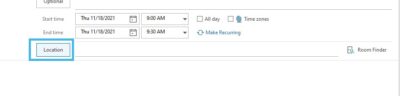
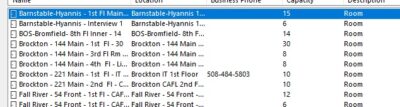
When booking a meeting, click Location to select a room from the list of rooms, and then book the meeting as usual.
The meeting confirmation will confirm your room booking request.